Friday 30 September 2011

Making a pkg file for installing sendLogon for Bloxx on OS X

In a previous post I described how we're getting a new web filtering system called Bloxx, which needs the sendLogon program to be installed and run as a login script on all the Apple Macs (OS X).

I used Iceberg free application to make the PKG file as I've used it before with relative ease, and also couldn't find the latest official Apple PKG maker app!!

Its all working now so here's how I did it:
  1. Made a new project in Iceburg, and made a nice little folder to hold all the files needed (makes it easier to find things)
  2. I filled in the top section "Settings"
  3. Next was the "Scripts" section. I had to make a script which changed the com.apple.loginwindow plist file to add the LoginHook /usr/bin/login.sh
    1. I ran nano from the command line (nano ~Desktop/sendLogonfiles/Install\ sendLogon/writeloginhook.sh)
       and typed:
    2.  #!/bin/tcsh
      sudo defaults write com.apple.loginwindow LoginHook /usr/bin/login.sh
    3. I found I had to put "sudo" into the script so that it had the right permissions to write to the file. Not sure why else it didn't work?
    4. I saved the file and made the file executable - chmod 755 ~Desktop/sendLogonfiles/Install\ sendLogon/writeloginhook.sh
  4. I then added this script to the "PostFlight" script, and set the path to "Relative". Note - I found an article here documenting the definition of each of these types of scripts. Most were concerned with whether this was an upgrade or not, and would only run once.
  5. Finally was the "Files" section. 
    1. I firstly put the files in the project folder.
    2. I set these files with the correct permissions (as in the tutorial folder for sendLogon). chmod 755
    3. Then, in Iceberg, I had to add the folders; /usr/ and /usr/bin/, which were not there.
    4. I then made the "Default Destination" the /usr/bin/ folder
    5. Finally I added the login.sh file and the sendLogon file.
I've just tested this through the Apple Remote Desktop Task Server on a single MacBook Pro and worked a charm (had to ring ICT though to add its' IP address to the Bloxx list of computers with sendLogon working)

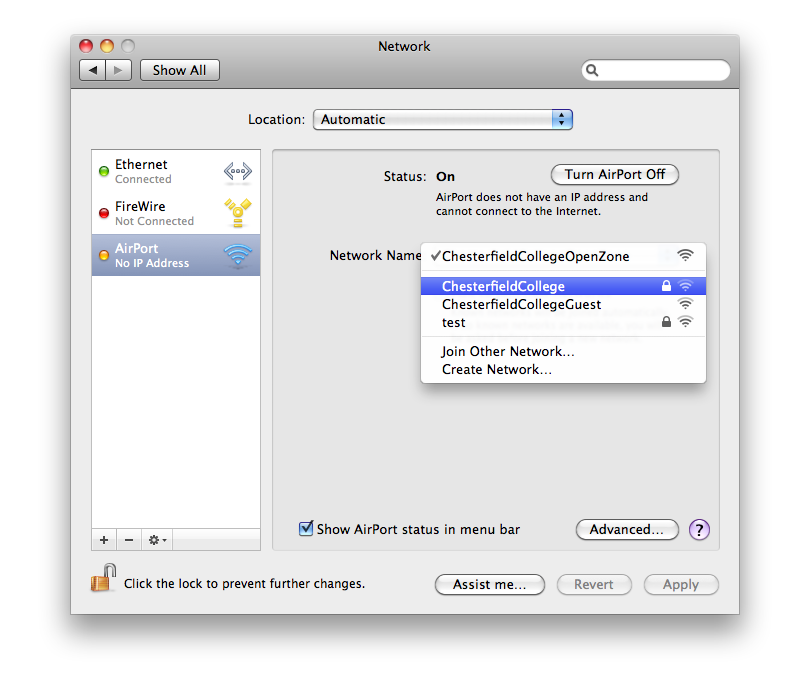
Note: There is potential also for adding to this a little script which changes the proxy settings to the system and maybe also Firefox, but it would be easier to control these settings through a .pac file or .wpad file.

Wednesday 28 September 2011

New Web Filter - Bloxx and sendLogon deployment on OS X

So we've now got a new web filtering system which needs testing on the Macs and then deploying. The new system is currently running alongside the old, the later of which will slowly be phased out.

The new system does come with one small bonus for the Apple Macs as it works alongside a program called "sendLogon" which sends the credentials of the user to the server and automatically authenticating them to use the internet. This sendLogon was downloaded here, and comes with instructions:


Running sendLogon automatically on Mac OSX
You need to take the following steps:

1) Download the Send Logon program from http://www.bloxx.com/downloads/sendLogon_osx_10.4.universal.tar.gz to the desktop.
2) Browse to ‘Applications->Utilities’ and run the ‘Terminal’ application.
3) Type ‘cd ~/Desktop’.
4) Type 'tar zxvf sendLogon_osx_10.4.universal.tar.gz'.
5) Type ‘sudo cp sendLogon /usr/bin’ and enter your password when prompted.
6) Type ‘sudo nano /usr/bin/login.sh’.
7) Enter the following lines:

#!/bin/tcsh

/usr/bin/sendLogon 3898 $1

8) When finished, press ctrl-o followed by return, to save the file.
9) Press ctrl-x to exit.
10) Run the following commands to set the correct permissions on the utility and login script:

sudo chmod 755 /usr/bin/login.sh
sudo chmod 755 /usr/bin/sendLogon

11) Run the following command:

sudo defaults write com.apple.loginwindow LoginHook /usr/bin/login.sh

The sendLogon utility should now run for every user that logs on.
This all worked splendidly. Our server address is XXX.XXX.XXX.21. The proxy settings are XXX.XXX.XXX.23 port 8080 though. Just need to remember that the computer has to be in the list of this filter system as using the sendLogon program (took me 20 mins before I remembered this!).

To deploy this the idea is to create a pkg file which copies the two files login.sh and sendLogon to /usr/bin and also sends the command for the LoginHook.

Note that all the Macs I will run this on do not have any login scripts which run from the computer and hence it doesn't matter if you overwrite the login.sh file. For those who do have login scripts then they will need to append to this file, which isn't too hard.

I will use the Iceberg App to create the pkg file and run it through the task server to deploy to all computer suites and staff machines.

We did have a choice whether to control the LoginHook from the Xserver or just have the clients controled locally. We chose the later as ICT Services do not control the Xserver, which is just used for the one Directorate.

I shall note in a later post how I created the pkg file.

Monday 26 September 2011

Firefox address bar and search not responding

We currently have Active Directory users logged into OS X machine using Firefox 6.0.2. We've always had problems with Firefox. Most notably the "A copy of Firefox is already open" error, which requires you to delete the Application Support/Firefox folder on the users home drive.

The most recent problems is that when you type in either an address or search in the boxes at the top, or the new "home" page which looks like google, but saved locally, when you press "enter" it does not do anything.

The way to fix this is to close Firefox and reopen it, which isn't really a fix but a rubbish work around. Although it sort of amuses me to say "Switch it off and back on again", I don't like saying it to fix random things such as this.

Office 2008 - Word file "is being used by another user" Error

One of the members of staff constantly gets the error message:

Some file is being used by "another user". Would you like to make a copy

It was quite a frustrating problem because you could open the Word .doc file in Pages, save it as another .doc file and then open it back up in Word. Of course the problem might pop up again with this new file.

It took about 25 mins to figure it out, thanks to the help of this forum. At the top I was reminded that there needs to be a ".TemporaryItems folder", in the folder which contains the Users home drives. I did this quite a few years ago.

Further down it also mentions Spotlight causing the issue. Simply make sure your Home Drive is in the "Privacy" section of Spotlight Preferences. Because I didn't want to log the user off, I also stopped the process as well called "Quick Look Helper". Worked a charm.


Of course I don't as yet know if you need to do this per user or per machine. I shall update this post when I find out.

In conclusion, I would also like to say that this is just a work around. You should not have to turn off Spotlight as it has a lot of good functions. I should think this is a problem with Microsoft Office 2008. I would also recommend Microsoft to make more accurate error messages. i.e. Your file is being used by another process. This process is: Spotlight. This would help solve problems a lot quicker and more efficiently.

Friday 23 September 2011

Bootpicker rebooting back into OS X i.e. not Windows

I have many computer suites which are set up as "Dual Boot". I install bootpicker through ARD and set the plist file settings through ARD also. I had a little trouble with some MacBook Pro's I set up in this way. It all appeared to work, what with the bootpicker screen coming up. But upon clicking "Windows" it rebooted the machine straight back into OS X.

This takes quite some time to realise if your busy multitasking, as you think: Oh, whoops, forgot to click Windows, better click it!

So I thought I'd best look into it. After a minute I figured out that all you need to do was a PRAM reset. i.e. hold down "cmd + alt + p + r" for at least one beep (maybe up to three)

After doing this it all worked beautifully. I guess there must be some setting in the PRAM which needs refreshing?

Installing Wacom Intuos 4 drivers through Apple Remote Desktop

A student brought in his Wacom Intuos 4 graphics tablet which I promptly installed on one of the computers, using the provided CD. They do all have Bamboo drivers, but it is slightly different for Intuos 4. I promptly found the .pkg file on the disk, which is in the "Program Files" folder on the CD.

I put this in Apple Remote Desktop for install and tested it on another mac. It came up with an error:
Error message: "Running Package Scripts..."

the "..." assumes that this might just be the extra little bits at the end of the installation. On looking on the computer it appeared to have installed the preference pane so I was pretty happy. Not sure what these extra "scripts" are but they might be for just removing files and such, hopefully nothing too important.

I later ran the install through the task server, to install on all in the computer suite. I expected the error which actually came up as:
Completed but failed on one package: "Install Wacom Tablet"

Anyway, I shall have a proper look later to see if it's worked as expected.

Wednesday 21 September 2011

Notify users when their disk space is running low

Well, after my last post about listing problems to fix and make my job that much easier, I thought I'd look up a script I had a while back which notified users when their disk space was running low. It really did save a lot of time and effort, as users would know exactly what the problem was: That their disk space was running LOW!

I couldn't make the script on my own back then (and still couldn't now) so I put up a "Help me" topic on the Apple Discussions and low and behold, someone came to help, amazing!

Here's the code, although you might have to read the discussion to get the right syntax as it didn't post quite right:

--****BEGIN SCRIPT
idle
on idle
set message_ to "Stephen! Don't trouble the technician, delete some files!"
set MinAllowFS to 20
try
set bootDiskInfo to do shell script "diskutil list | grep 'stephen'"
set bootDiskID to last word of bootDiskInfo
set FSinfo to do shell script "diskutil info " & bootDiskID & " | grep 'Free Space'"
set ActFS to word 3 of FSinfo

--Pick one or more of the following responses by removing the comment ("")

--if ActFS < MinAllowFS then beep 3

--if ActFS < MinAllowFS then display dialog message_

if ActFS < MinAllowFS then say "[[rate 180]]" & message_
end try
return 10 --<< Here's where you set the repeat rate in seconds
end idle
--
****END SCRIPT


The message wasn't quite what I had in mind. I wanted to inform the students that their disk space was running low and might cause some problems. They should take action by moving files off their home space, and emptying the trash. Something more along the lines of:

set message_ to "Your home space is running low, this may cause applications to crash and even corrupt you files. Please move some files off your home drive and don't forget to Empty the Trash."

The MinAllowFS is the threshold for the message to kick in, currently set to 20MB

As I wanted it to run for any networked user that was logged in, I ended up using the command "df -k -m" instead of "diskutil list". This lists all volumes mounted and the amount of space left in MB (-m). This df command is more useful then the 'diskutil' command as it gives us the free space straight away. The specific line from this list contains the word "students" so this line would read:

set bootDiskInfo to do shell script "df -k -m | grep 'students'"

Word 4 of this is the amount of disk space left, in MB

set ActFS to word 4 of bootDiskInfo

So the whole script should read:

--****BEGIN SCRIPT
idle
on idle
set message_ to "Your home space is running low, this may cause applications to crash and even corrupt you files. Please move some files off your home drive and don't forget to Empty the Trash."
set MinAllowFS to 20
try
set bootDiskInfo to do shell script "df -k -m | grep 'students'"
set ActFS to word 4 of bootDiskInfo

--Pick one or more of the following responses by removing the comment ("")

--if ActFS < MinAllowFS then beep 3

if ActFS < MinAllowFS then display dialog message_

--if ActFS < MinAllowFS then say [[rate 180]] & message_


end try
return 300 --<< Here's where you set the repeat rate in seconds
end idle
--
****END SCRIPT


------------------ 28/09/2013 ----------------
I've just came back to this post and finally got around to implementing it. I ended up with a problem having two lines of output from the df command, because two lines contain the word 'student'. To solve this, I had to use the grep -v option, which is the inverse of the grep command, finding the lines without it in. So trigger is on the line I don't want so the command I used was:

df -k -m | grep 'students' | grep -v 'trigger'


Script is now:


--****BEGIN SCRIPT
idleon idleset message_ to "Your home space is running low, this may cause applications to crash and even corrupt your files. Please move some files off your home drive and don't forget to Empty the Trash."
set MinAllowFS to 10
tryset bootDiskInfo to do shell script "df -k -m | grep 'students' | grep -v 'trigger'"
set ActFS to word 6 of bootDiskInfo
--Pick one or more of the following responses by removing the comment ("")
--if ActFS < MinAllowFS then beep 3
if ActFS < MinAllowFS then display dialog message_
--if ActFS < MinAllowFS then say [[rate 180]] & message_
end tryreturn 300 --<< Here's where you set the repeat rate in seconds
end idle

Now I have written a few programs, I'm getting the hang of writing them properly. A few things I would like to adjust are:

  1. verify (assert!) that ActFS is set to an appropriate number (not a letter or symbol)
  2. check if it is a member of staff and not a student and look for "staff" instead
  3. feed back to the user how much disk space there is free, total disk quota.
  4. give user the option of running a utility which will help identify larger files and folders
  5. contact administrator for help (either by remote desktop or email)

Tuesday 20 September 2011

Little problems to fix in the future

Going along the line of making programs to fix problems, I thought I'd compile a list of problems which can be added to the "Fix Everything Please" Application:

  • Checking Users Home Space and notifying them
  • Deleting erroneous files and Emptying the trash
  • Showing users the files worth deleting from their home space
I shall add to this list as time goes by...

Making a pkg file to distribute through ARD Task Server


After making my little "Fix Everything Please" Automator Application I wanted to distribute it to all the machines, and the easiest way of doing this is using the much unused Task Server I have set up through Apple Remote Desktop. I have done this process before, but not documented it very well. What's worse is that I cannot find the newest "PackageMaker" application since re-imaging my machine, only the one which comes with Remote Desktop, which was originally for OS X 10.4! Apparently you can download it with the newest iPhone SDK which comes with XCode.

So, after some looking I found a well reviewed Package Maker app called Iceburg. Downloaded it, installed it and rebooted. Apparently it's a lot simpler then PackageMaker and I'd made the package in about 3 minutes. This is how I did it:

  1. Make a "New Project"
  2. Fill in the "Settings" section:
  3. Settings section of Iceburg Package Maker
    1. I put Admin Authorisation so there would be some control
  4. Fill in the Files section at the bottom:
    1. I clicked on Applications and pressed the "Set" button to set this as the Directory it was going
    2. Files section of Iceburg Package Maker
    3. I right clicked on the Applications folder and chose "Add Files..." and chose "Fix Everything Please.app" (I made sure the permissions were right in Finder before I did this)
  5. Clicked "Build and Run" in the top menus
Worked a charm. I had a little trouble getting the permissions right. At first it would make it "Read Write" for "Everyone". I changed the permissions and then re-added it to Iceburg and it seemed to work.

Fixing iPhoto '11 library on "unsupported Volume"

I make a little application to fix all the little problems we have a the college, and one of the new problems which has come up is this iPhoto not supporting library's on non - hfs+ journaled volumes. If you load iPhoto and it either; detects your iPhoto Library needs updating, or it wants to create a new library, it will check the type of volume it is saved on.

A work around for this problem I posted here, which involves moving or creating an iPhoto Library on a HFS+ Journaled volume, letting iPhoto update it if it needs it. Then closing iPhoto, move the library to the volume you want it, double clicking it to load it up in iPhoto.

iPhoto only checks the volume in these two circumstances and does not (at the moment) check any other time. So once a library is updated then you will be able to use it forever afterwards with no error.

I wanted to create an Application which did this process for you. The exact process would be:

  1. Ask the user whether or not to go ahead with the fix
  2. look for the location of the iPhoto Library, or whether there is one
  3. If there is one, move the current one to the Users/Shared folder
    1. open iPhoto with this one so that iPhoto can update it
    2. close iPhoto
    3. move library to ~/Library/Pictures/
  4. If there was not an old one, then copy a previously made one from secret place to ~/Library/Pictures/
  5. Open iPhoto with this iPhoto Library or set this library as the default.

Monday 19 September 2011

Making an Application which fixes all the little things

Fix Everything Please Application
A while ago I had the idea of making a little application which fixes any little problems we have in the college with the Apple Mac accounts. Part of the trouble is to do with the Active Directory accounts, but a lot of the trouble comes from Applications coming up with errors related to the preferences.

Basically, this program deletes preferences and folders to all the programs which cause the most problems.

I made the program in Automator, and it basically just runs a shell script with a lot of 'rm' for removing stuff. I originally tried using a lot of the options in the library to find certain files and put them in the trash. This doesn't work for different users though, as they have a different location for their home drive. So I ended up using the '~' option to specify the users home drive:

these three lines remove anything related to Adobe:

rm -R -f ~/Library/Application\ Support/Adobe/
rm -R -f ~/Library/Preferences/Adobe*
rm -R -f ~/Library/Preferences/com.adobe*

this removes the key Firefox preferences, which cause it to say "A copy of Firefox is already open"
rm -R -f ~/Library/Application\ Support/Firefox/

this removes any ScanWizard preferences
rm -R -f ~/Library/Preferences/com.microtek*
rm -R -f ~/Library/Preferences/Microtek\ Preferences/
rm -R -f ~/Library/Preferences/Microtek*
rm -R -f ~/Library/Preferences/ScanWizard*
rm -R -f ~/Documents/ScanMaker\ 8700/

this removes any HP Scanner preferences
rm -R -f ~/Library/Preferences/HP*
rm -R -f ~/Library/Preferences/com.hp*
rm -R -f ~/Library/Preferences/ScanExpert\ Folder/

This removes Nikon references for the Nikon browser
rm -R -f ~/Library/Preferences/Nikon/
rm -R -f ~/Library/Application\ Support/Nikon/

This removes the Network Home Relocation for the Caches folder and makes a new one

rm -R -f ~/Library/Caches
mkdir ~/Library/Caches

I added the -R so that it would force the removal, and the -f so it doesn't come up with an error if the file/folder doesn't exist.

Here's a screenshot of the workflow in Automator:

Automator workflow for "Fix Everything Please"
It proves very popular amongst the students and staff here, and I just add to the list when another program has this sort of problem. I just have to work out a quick way of deploying it to all the workstations, hopefully make a '.pkg' file and put it to the task server.

Friday 16 September 2011

Tutorial for setting the scratch disks on Final Cut Pro


Final Cut Pro

Scratch Disk Settings


Final Cut Pro saves all the files it needs to a “Scratch Disk”. You WILL need to set this up when you start a new project.

Upon loading Final Cut Pro for the first time it will ask you to set up your project:


To view and change these settings from Final Cut Pro you can go to the top left corner:
Final Cut Pro > System Settings


Wednesday 14 September 2011

iPhoto '11 (version 9) library's volume is unsupported

After recently updating the OS and iLife to 10.6.6 and iLife '11 I've found that for networked users (using Active Directory hosted on Windows servers) this message appeared:

Error
The library could not be opened because the file system of the library's volume is unsupported

It became apparent that the new version of iPhoto does not support photo library's on this type of networked volume. I have now found it to encompass any type of volume which is not 'Mac OS Extended (Journaled)'.

I found quite a few postings on the subject, but most were concerned with NAS storage backup stuff, for which a few solutions were posted, but nothing relating to Active Directory windows servers stuff. But, at last, after a few more minutes I came across this post by PJ_AU down the bottom:
  1. Simply double click on the iphoto library located in the Pictures folder.
This opens it up in iPhoto, and iPhoto does not check the volume it is on.

For new users:
  1. 'Alt' click on the iPhoto icon in the dock (this opens iPhoto prompting for a library)
  2. Create a new iPhoto Library on the local Mac OS Extended (Journaled) volume
  3. Close iPhoto
  4. Move the Library to the networked (or unsupported) volume
  5. Double click it to open it in iPhoto
From then on iPhoto does not check the volume the library is on. It ONLY checks the volume when creating or updating the iPhoto Library.

Tuesday 13 September 2011

Scanning on the Microtek ScanMaker 8700


OS X - In ‘Finder’ go to Applications > ScanWizard 5 Folder > ScanWizard 5


Network Home Redirector - reverting back

Back when we had OS X 10.5 installed throughout the computer suites we had to run a script at startup which created a symlink for Caches in the users Library folder. These scripts were called NHR (Network Home Redirector) This linked to a folder stored locally, as the caches folder stored on the Active Directory smb shares had permissions issues for some applications.

The only thing which didn't work quite as planned was the fact that the logout scripts never ran, and so people were left with the symlink in their Library folder.

Now we have updated to OS X 10.6.6, this permissions issue seems to have resolved itself. But anyone who logged in last year has now got a symlink for their Caches folder, and not a folder! To resolve it I plan to make a small script which, upon login, looks for a symlink, deletes it and makes a nice new folder.


I've had a look at the man page for 'ls' function, and if you use the -l command in it, it shows you more info on the files and folders. Any with a 'l' at the beginning of the line are symbolic links. I ran the command with the grep command to pick out the Caches folder:

ls -l Library/ | grep 'Caches'
lrwxrwxrwx+ 1 leachs  CHSTFADMIN\teaching_global     19 15 Sep 14:00 Caches -> /tmp/leachs/Caches/
So thats a good start.

Microtek ScanMaker 8700, ScanWizard Pro and OS X 10.6

After upgrading all the machines to 10.6.6, ScanWizard Pro 7.20 kept coming up with an "error -1" when the application was loaded up, and also an "error -30000" when we tried to initiate a scan. It obviously wasn't made for 10.6.

I updated to ScanWizard 7.62, but this couldn't find the ScanMaker 8700. It actually appeared in the scanner probe but wouldn't let you click on it. Quite frustrating!

So, I did a quick search for the problem and found this article by Microtek. They've got a work-around:

  1. Download and install ScanWizard 5
  2. Download and install the ScanMaker 8700 specific driver
It has to be done in this order for some reason. I also removed ScanWizard Pro 7 so there wouldn't be any confusion.

I also revised the tutorial on how to use the software. I'll put it on my next post

Monday 12 September 2011

Creating Stripes in Illustrator using Patterns and Live Paint

I recently wanted to fill in a circle is some stripes in Illustrator, but alas it was not self explanatory. After looking it up on the old reliable internet I found quite a few posts describing a technique of copying and pasting lines throughout. Not really what I wanted to hear. The process I wanted was something along the lines of:

Mythical solution (does not really work this way, although I would like it to)

  1. Get the fill tool
  2. Select "Stripes"
  3. Fill object

I decided to investigate myself. I finally came up with a pretty close technique.
Making two lines into a "Pattern"
  1. Draw a line and make it a stroked colour of some thickness
  2. Copy and Paste it next to the first, making it stroke a different colour
  3. Select both lines and go to - Edit > Define Pattern
  4. Click on "Live Paint" from the left toolbar
  5. From the Fill Colour box at the top you can select the striped pattern you just made
  6. Click on the object you want to fill with stripes
Star filled with striped pattern
To change the colour of the stripes:
Changing the colour of pattern using
"Recolor Artwork"
  1. Select the fill (double click on it).
  2. Select "Recolor Artwork"
  3. Go get the option to change each of the colours in the fill:

Just found this post which describes a similar process using boxes, and dragging the boxes into the "Swatches" to create a pattern. Also how to rotate it, simply right click > Transform > Rotate  and tick "Pattern". Nice.
Rotating a pattern

Friday 9 September 2011

WallSpaceVidualArts coming soon

Just made the coming soon front page for the website www.wallspacevisualarts.co.uk. All works well, apart from in Firefox 4.0.1. Have a look at this:

Firefox 4.0.1 in background, Safari 5.0.4 in foreground. Notice you can't see the bottom email address in Firefox, and the last part of the phone number


Looks like Firefox 4.0.1 either makes the text too big, or makes the gaps (padding and margins) too big. Quite frustrating. Might be because I used em's for the font size?

Yep, worked it out in the end:
Firefox 4.0.1 in background, Safari 5.0.4 in foreground - fixed inconsistency
So, I started by changing margins which had no effect. I then tried changing font size from 'em' to 'pt', but this didn't work either. Finally tried the old 'line-height', changing from 'em' to 'px' which fixed it. Safari and Firefox are not the same when it comes to 'em's and 'line-height'. I still don't exactly know what 'em' means, but I'm sure I'll look it up one of these days.

Also to note was the slight differences in title formating. I used h1, h2 and h3 for the headers and footers, and there was a slight inconsistency with margins on them. Had to set them to 0px.

Also, for the "JOHN KING" text and phone number, I put a little bit of 'word-spacing' using 'em's, this is inconsistent between these browsers, so I changed it to 'pt'.

I also manually changed the margins for the '
' paragraphs. This is what gives it a bit of space at the top and bottom. I manually changed these so that I could determine the exact distance between the top and bottom of the main text.

Tuesday 6 September 2011

Transferring pictures on an iPad and any iOS device

Well, it is funny how user friendly the iPad is, and yet how puzzling it can be to do simple tasks. One such task is to transfer pictures onto an iPad. One would think it quite simple, perhaps drag and drop, bluetooth, through iPhoto; but alas these are not the way to do it.

Amazingly I had to look this up on the internet and found quite a few blogs, this one being helpful. Basically you need to sync either a folder or album to the iPad, which is controlled through iTunes.
  1. Load up iTunes and plug in iPad (or iOS device)
  2. Click on the device on the left hand side of iTunes
  3. Click on the Pictures tab
  4. Tick the sync box and select "folder" or whatever is relevant to you
Simple but not the way I would have done it.

Monday 5 September 2011

802.1X login with OS X 10.6.6 and Active Directory

After re-imaging all the computer suites, there were a few machines without ethernet connections. These I had to set up using 802.1X logins on OS X 10.6.6, something I hadn't tested, although in theory there would be nothing different then the setup with OS X 10.5.8. But I've now just noticed that I have not written this process down, so this will be the first connotation of it:

After a few trials and tribulations I discovered the best (quickest and easiest) way to get the to log in wirelessly on Active Directory accounts using 802.1X.

  1. Go to Network Settings in System Preferences
  2. Click on Airport, turn it on and connect to ChesterfieldCollege wireless network:
  3. Authenticate using the login details which will be used in the 802.1X authentication (needs to be the full username i.e. username@students.chesterfield.ac.uk. I think I also unticked the "Remember Password" box.
  4. Accept the certificates (if you get any) and hopefully you should be connected
  5. Click on Advanced and then go to the 802.1X tab
  6. We are going to add a System Profile, so that whenever the computer is on, it'll always be authenticated on the wireless with a certain username and password.
  7. You need to fill out the FULL username (.......@students.chesterfield.ac.uk) and password, tick TTLS and PEAP (might just apply to this wireless) and select ChesterfieldCollege as the wireless to use. Oh and WPA2 Enterprise.
  8. Before we click OK I've found I also need to add the server certificate we just accepted (no.5) to the certificates. So go to Certificates, click add "Select Certificate from Keychain" and select the one you added:
  9. Click OK, OK and when back on the initial Network Settings screen, click "Disconnect" under 802.1X.
  10. Now restart the machine and see if it works!
In my experience, the wireless login takes a few more minutes to authenticate, so when restarting a machine you might want to give it a minute before trying to log in.

If it doesn't work, login as your administrator and see if it's connected to the wireless using 802.1X, and if not, delete the System Profile in Advanced and see if you can connect to it normally. Just keep on trying, and perhaps you added the wrong server certificate?


....
After doing this I always found a few machines which would come up with the "Error connecting to 802.1X" blaa blaa blaa. After a bit of trial and error it turns out that if I moved the machines to another part of the room it worked. Thus, the error message only came up when there was a low signal. Simple.

Thursday 1 September 2011

Setting Ignore ownership on this volume from Command Line ARD

I have a lot of computers, all with a separate volume for storage of files, mostly for Video editing storage. After re-imaging them all I need to set the other volume, which is named "Scratch Disk" so that it does not have any permissions, as it causes issues when groups of students use the same files.

This is a little tick box in the 'Get Info' box for that volume in the Finder. But to do it on all these macs would not be economical with my time. So the best thing to do would be to find the command line argument for it, and use Apple Remote Desktop (ARD) to send this command to all the computers.

After a quick search I found this article by apple explaining how to do the opposite; "do not ignore ownership on this volume". To do this the code was:


sudo vsdbutil -a /Volumes/NewHD/
I did a quick man on this "vsdbutil" and found the argument I was looking for -d. So the actual line to use is:
sudo vsdbutil -d /Volumes/Scratch\ Disk/
notice the "\" character just after the word "Scratch", which denotes that there is a space after it. Of course I run the command line as a root user so no need to have the "sudo" at the front.